Overview
Uploading a custom world to a Minecraft server enables players to enjoy a unique and personalized environment. Custom worlds offer the freedom to design landscapes, structures, and challenges. Sharing creations with fellow players is also possible through custom world uploads. It fosters a sense of community and collaboration among players, as they can explore each other's creations and provide feedback, leading to a richer and more engaging gaming experience.
Note: An FTP client can speed up the transferring for large worlds. Learn how to use an FTP client here.
Note: World save location will vary depending on the type of launcher used. For the official launcher, saves can be found in %appdata%\.minecraft\saves\ .
How To Upload a Custom World to a Minecraft Server
Step 1. Locate the custom world folder.
Step 2. Log in to the Meloncube Games panel.
Step 3. Stop the server.![]()
Step 4. Log in to the Minecraft server with SFTP.![]()
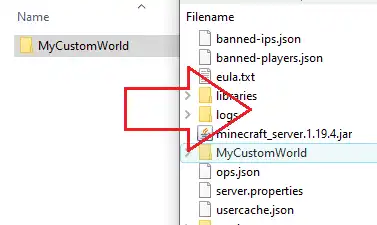
Step 5. Drag and drop the custom world folder from Step 1.
Step 6. Return to the Meloncube Games panel.
Step 7. Go to the Config Files tab on the left and select Server Properties.
Step 8. Find the Level Name field.
Step 9. Change the text to the custom world name from Step 5.
Step 10. Start the server.![]()
- minecraft, Minecraft server, minecraft upload world, minecraft upload custom world
- 39 Users Found This Useful
