Overview
The Multiverse plugin is a popular addition to Minecraft servers, enabling the creation and management of multiple worlds within a single server instance. Server administrators use Multiverse to offer diverse gameplay experiences, such as separate worlds for survival, creative building, or minigames. This plugin provides efficient tools to generate, modify, and manage these worlds while allowing players to move between them seamlessly.
Requirement: Bukkit or Spigot must be installed on the server.
Note: Running commands in-game need OP permission. Learn how to give permissions here.
How To Add Extra Worlds to a Minecraft Server (Create World)
Step 1. Download Multiverse here.![]()
Step 2. Minimize the file to use later in the guide.
Step 3. Log in to the MelonCube Games panel.
Step 4. Stop the server.![]()
Step 5. Go to the Files tab on the left.![]()
Step 6. Open the plugins folder.![]()
Step 7. Drag and drop the .jar file from Step 2.![]()
Step 8. Start the server.![]()
Step 9. Run the following command in-game or in the console to create a world:/mv create [World Name] [Normal, Nether or End] [-s Seed]![]()
![]()
Note: The seed is optional.
Step 10. Once it completes, run the following command to teleport to the new world:/mv tp [Player Name] [World Name]![]()
![]()
How To Add Extra Worlds to a Minecraft Server (Import World)
Step 1. Locate the custom world folder.
Note: World save location will vary depending on the type of launcher used. For the official launcher, saves can be found in %appdata%\.minecraft\saves\ .
Step 2. Log in to the MelonCube Games panel.
Step 3. Stop the server.![]()
Step 4. Log in to the Minecraft server with SFTP. Learn how to use an SFTP client here.![]()
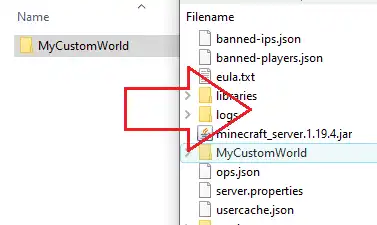
Step 5. Drag and drop the custom world folder from Step 1.
Step 6. Start the server.![]()
Step 7. Run the following command in-game or in the console to import the world:/mv import [World Name] [Normal, Nether or End]![]()
![]()
Step 8. Once it completes, run the following command to teleport to the imported world:/mv tp [Player Name] [World Name]![]()
![]()
